How to set up your Roku Streaming Stick 4K+
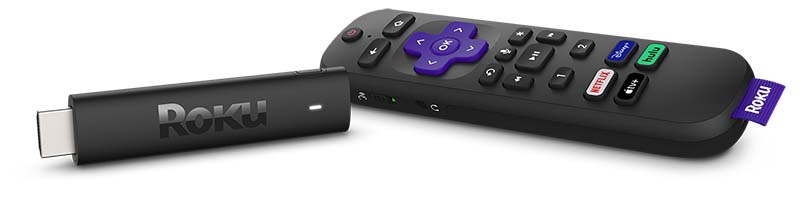
The Roku® Streaming Stick® 4K+ (model 3821) supports 720p HD, 1080p Full HD, 4K Ultra HD (4K) and HDR (High Dynamic Range) and ships with a Roku Voice Remote Pro. This article describes the product in more detail and outlines the setup steps.
Will the Roku Streaming Stick 4K+ work with my TV?
Your Roku Streaming Stick 4K+ will work with any television with an HDMI® connection and connects directly to the TV's HDMI port. However, you will not be able to take advantage of 4K resolution, or Dolby Vision™, HDR10+, and similar HDR formats without a compatible TV. You can see more requirements in the detailed articles about setting up your Roku player for 4K or setting up your Roku player for HDR.If your Roku Streaming Stick 4K+ will not fit in your TV's HDMI port due to space restrictions, then you may wish to get a free HDMI extender cable.
What is the long-range Wi-Fi® receiver?
The long-range Wi-Fi receiver is part of the USB power cable that must be attached to your Roku Streaming Stick 4K+. It allows your Streaming Stick to connect to your wireless network and the internet so you can stream movies, TV shows and more. The Wi-Fi receiver is designed to reduce wireless interference providing a faster and more reliable connection. Power is provided to your Streaming Stick by connecting the USB power cable to the USB port on your TV, or preferably, a wall outlet (when used with the power adaptor). It is important to use the USB cable that came with your Streaming Stick—using another cable will prevent it from turning on (error 022).
Setting up your Streaming Stick
Review the Quick Start Guide below, or follow along with the tutorial video:
 Roku Streaming Stick 4K+ (model 3821)
How to connect your Streaming Stick
Connect your Roku device to a TV
The first step to setting up your Roku player is connecting your Roku streaming device to a television with an HDMI® port.

Note: We recommend using the HDMI cable that comes with your Roku device to connect to your TV. If you must replace it, use a High Speed HDMI Cable if your TV only supports 720p and 1080p, or a Premium High Speed HDMI Cable if your TV also supports 4K Ultra HD or HDR.
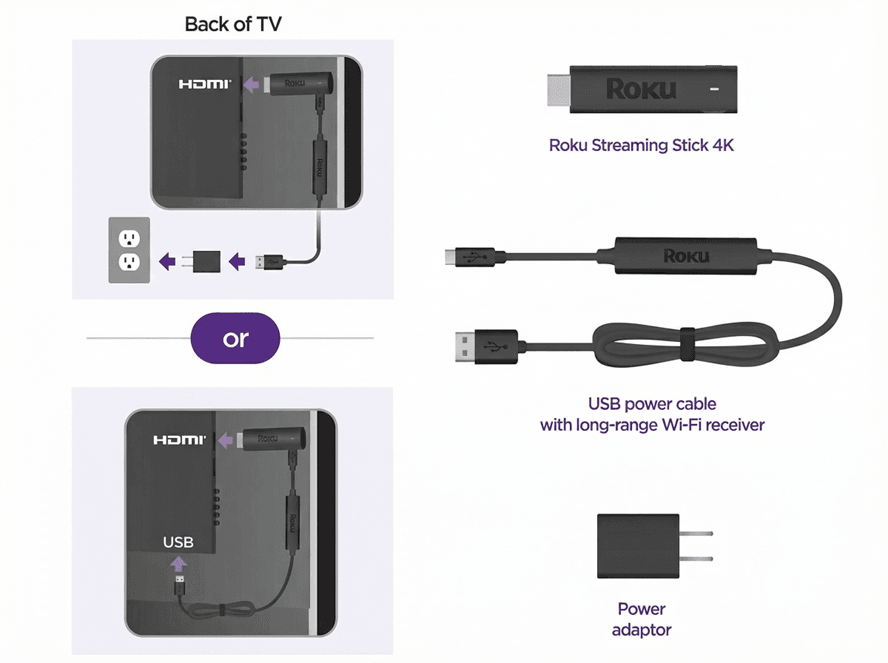
Connect to power
Next, connect your streaming device to a power source. If your Streaming Stick will not easily connect to the HDMI port on your TV due to space restrictions, then you may wish to get a free HDMI extender cable. It is important to use the USB cable that came with your Streaming Stick—using another cable will prevent it from turning on (error 022).- From a USB port on your TV
All Roku Streaming Sticks support USB power, as do some Roku players. If you are connecting your Roku device to USB power, use the USB power cable to connect it to a USB port on your TV.
- From a wall outlet
Use the USB power cable and power adapter to connect your Roku streaming device to a wall outlet.
Note: The USB port on some TVs may be unable to power a Streaming Stick. If you see the on-screen warning message that appears in these cases, use a wall outlet.
Power on your TV and select an input
- Use your TV remote to power on your television and select the input where you connected your Roku device.
- Help is available if you do not see any picture on your TV.
Set up your Roku remote
Use the Roku remote to control your new streaming device.
Roku Simple Remote
- Insert fresh batteries and point the remote at your Roku player.
Roku Voice Remote
- Follow on-screen instructions to pair your remote.
Tip: If you still need help determining which remote you have, review the article with tips for identifying your Roku remote.
If you need more help with your remote, learn how to fix any issues with your Roku simple remote or how to set up and pair your Roku voice remote.
Connect to the Internet
- Choose a language: Scroll through the list and press OK on your Roku remote to choose a language. All text and dialog within the Roku interface will be displayed in the selected language.
- Select an Internet connection:
- Using Wi-Fi
- Select Wireless and choose your home network
- Enter your Wi-Fi password and connect
- Using Wi-Fi
Click Connect to automatically connect to the Internet. Learn what to do if you cannot connect to the Internet.
Using Wired Connection (Optional)
If your Roku player has an Ethernet port, connect it to your router with an Ethernet cable. For some models without an Ethernet port, you may use a compatible Ethernet adapter.
Install updates
- After you connect to the internet, your device will automatically check for software updates.
- Wait for the updates to finish installing, then move on to the next step.
Note: For 4K or HDR, ensure all connections support HDCP 2.2. Select Set Display Type to automatically adjust the resolution to match your TV, depending on your settings.
Set up your Roku voice remote to control your TV (Optional)
This setup step only appears if you are using a Roku voice remote with TV controls. Certain Roku devices released in 2017 and later include this remote, or you can purchase one from the Roku accessories store.- Follow the on-screen instructions to automatically set up your Roku voice remote to control your TV.
- You can set up your remote for TV control at any time from the Settings menu. A Roku voice remote may not be able to control volume and power on all TV models. With some TV models, you may only be able to control the volume, and not the power.
Activate your Roku account
- Follow the on-screen instructions to begin activating your account. You will need another device, such as a phone or tablet, to verify your email.
- Sign in or finish creating a free Roku account. Learn how to activate or create a Roku account if you need help.
Note: Roku does not charge activation fees. Beware of scams.
Enjoy your Roku device!
With all steps complete, your Roku streaming device is ready to use. You can personalize your device by changing your theme pack or screensaver and you can use the Roku Channel Store to add new streaming channels, games, and other apps.
Last updated at 3/10/2026 10:31:46 PM
Was this article helpful?
Related articles
Need more help?

Chat with us
Get help from our support bot or connect to an advisor.