How to set up your Roku Battery Camera
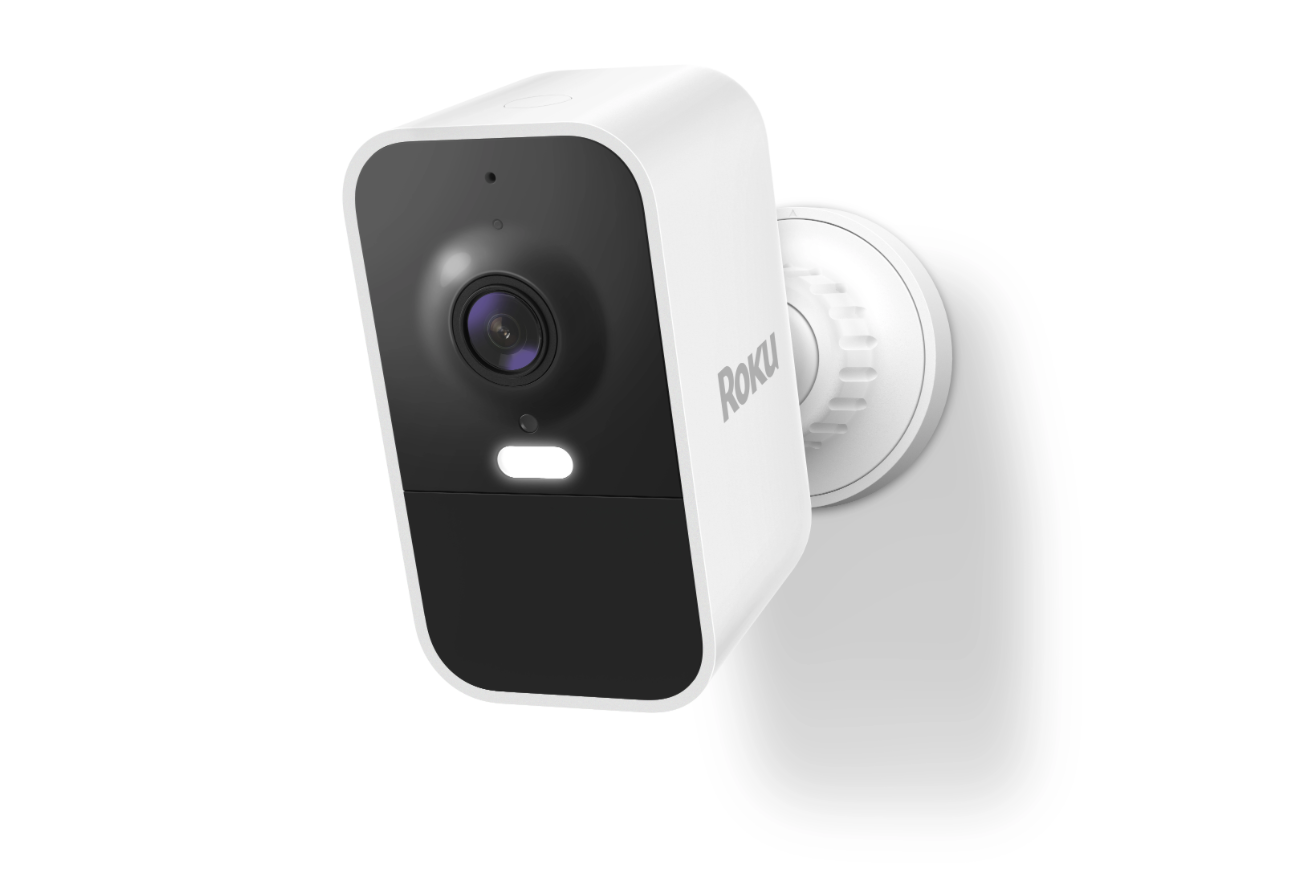
Your Roku® Battery Camera delivers 1080p image with great features like a spotlight to illuminate low-light areas, color night vision (excluding SE model), instant notifications, two-way audio, and motion detection. The Roku Battery Camera is suited for sun, snow, and rain with IP65 weatherproofing. Plus, if you purchase a Roku Smart Home Subscription, you also get secure cloud storage, instant recordings when motion is detected, and intelligent person, pet, and object detection.
Your outdoor camera includes everything you need to get started including a USB cable and mounting hardware. Simply download and install the free Roku Smart Home mobile app and use it to connect your camera to your network. You will be ready to view the video stream, receive alerts, and personalize settings in no time.
What you need for setup
- Charge your camera: Use the USB cable that came with your device and plug it firmly into your camera and into a known good power source that provides 5V/2A. Make sure the status light turns on. When it's solid green, your device is fully charged.
- Prepare your camera for an update - In order to get your camera out of shipping mode, hold down the Setup button for 10 seconds.
- Have your Wi-Fi® password ready: Your camera connects to Wi-Fi using a 2.4GHz wireless network connection with WPA/WPA2 security standard. You can place your camera further away without losing connectivity thanks to Wi-Fi 6.
- Grab your smartphone or tablet: You need to download and install the Roku Smart Home app for iOS® and Android™ to set up and control your outdoor camera.
- Check the status light: The status light on your camera will flash green when plugged in and turn solid green when fully charged.
| Model | Charge Time | Battery Life |
|---|---|---|
| Roku Battery Camera | 2-5 hours | Up to 6 months |
| Roku Battery Camera Plus | 8-20 hours | Up to 2 years |

Note: Battery life will vary based on device settings, use, and environmental factors.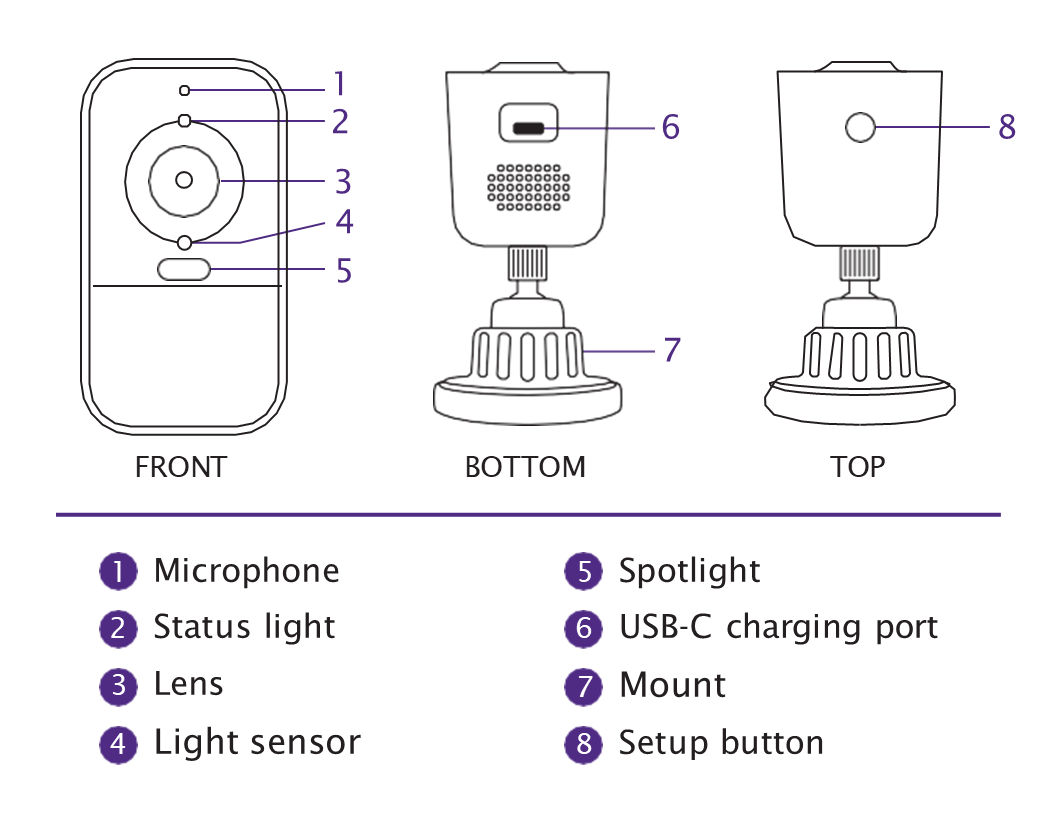
Connect your camera
Before you get started, make sure your smartphone or tablet is connected to your Wi-Fi network (e.g., MyNetwork_2.4GHz). Next, launch the smart home app and create a new Roku account, or enter the username and password for your existing account. After you sign in perform the steps below to connect your camera
Add camera in Roku Smart Home app
- Tap the plus sign
 from the navigation bar and select Add device
 - Select Cameras & doorbells and choose Roku Battery Camera
- Connect your device to your wireless network by choosing the network and entering your Wi-Fi password
- The status light on your camera will pulse white as it connects
- Check the box on screen when you camera is connected and tap Next
- Name your camera and press Finish
With the Wi-Fi connection, your camera can record videos to the cloud with your Roku Smart Home Subscription. You also get instant recordings when motion is detected, and intelligent person, pet, and object detection. Learn more about the premiere features available with your Roku Smart Home Subscription.
Note: If the light on your Roku Battery Camera is solid yellow or off when connecting it to Wi-Fi, unplug the device and press and hold the Setup button until it starts blinking blue again. Follow the instructions within the Smart Home App to setup your device again.
Where to install your camera
- Placement: Be sure to choose a location on a flat surface or mount it in an unobstructed location.
- Temperature: The camera is designed to operate in environments between 4°F and 122°F (-20°C to 50°C). For best results, place it somewhere that stays within this range.
- Battery life: To get accurate notifications and the best battery life, choose a location that avoids direct sunlight, high traffic roads, and dense brush.
- Mounting help: For help attaching it to a wall or ceiling, check out some mounting tips for Roku Smart Home cameras.
Uses
Your camera is designed for a variety of activities that include:
- Security cam: Set your camera to record video anytime sound or motion is detected, inside or outdoors.
- Pet cam: Keep an eye on your furry friends while you are at the office.
- Wildlife cam: Set up your camera to detect motion and capture wildlife around your home.
Tips for preserving battery life
- Change Camera placement to point away from heavy motion such as streets or sidewalks
- Limit how often you view the livestream from the Roku Smart Home App
- Ensure you have set up right event detection and recording settings. In the Roku Camera App, select your camera and go to Settings
 > Battery. Learn more about troubleshooting your camera's battery life.
After your camera is charged, review the Quick Start Guide.
 Quick Start Guide
- Roku Battery Camera (model SCB11X/SCB12R)
What do the status lights mean?
The status light is located at the front of the camera. As you proceed through the setup process, it is important to understand what each status light means.
Before set up
| Status Light | Status |
|---|---|
| BLUE - Pulsing | Ready to connect |
| YELLOW - Slow blinking | Booting up/Updating firmware |
| WHITE - Fast blinking | Connecting to a network |
After set up
| Status Light | Status |
|---|---|
| RED - Blinking (3 times) | Error |
| GREEN | Fully charged |
Using your camera
When you want to learn more, check out some of the other great features your outdoor camera offers.
Troubleshooting
If you experience connection issues with your camera, try the following steps:
- Charge your camera. The status light on your camera will turn solid green when it is finished charging.
- Try moving your or camera to another location to strengthen the signal and reduce interference. Learn more about troubleshooting your camera's Wi-Fi connection.
- You can factory reset your camera by pressing and holding the Setup button on the top for 10 seconds. Follow the instructions within the Smart Home App to set up your camera again.
If you experience charging issues with your Battery Camera try the following steps:
- Use a power adapter with a minimum of 5V/1amp (1000 Milliamps) output. It is suggested to use a 5V/2amp (2000 Milliamps) output for better charge time.
- If you use an adapter with lower than the suggested minimum output the camera will not charge and will not show a light at all.
- Do not use a computer/laptop USB port to charge as they may not provide enough power.
- Make sure you are using the provided USB-C to USB-A cable and make sure both ends are plugged fully into both the outlet on the camera and on the charging point.
- Try another known good power adapter with the suggested charging specifications and wall outlet if the camera is still not charging.
Last updated at 2/25/2026 9:32:24 PM
Was this article helpful?
Related articles
Need more help?
