How to set up your Roku streaming player for 4K Ultra HD
With 4K resolution and HDR (High Dynamic Range), movies and shows look better with brighter colors and more detail. There are different types of HDR, like HDR10, HDR10+, Dolby Vision™, and HLG. Not all Roku players or TVs support every format of HDR, so it's important to check your devices first. This guide will walk you through everything you need to set up your Roku player and TV correctly, so you can start enjoying better picture quality.
What is 4K Ultra HD?
The term “4K Ultra HD” (also known as 4K Ultra High Definition, 4K UHD, or just 4K) refers to the resolution of the TV, which is a measure of how much detail you can see on the screen. The resolution of a traditional 1080p Full HD TV is limited to 1,920 columns and 1,080 rows of pixels, while a 4K Ultra HD TV has an increased resolution of 3,840 columns and 2,160 rows of pixels. With four times the resolution of 1080p, 4K Ultra HD offers improvement in picture clarity over existing HD resolutions.
Requirements
The following are required to enjoy 4K Ultra HD content on a compatible Roku player.
- Compatible 4K Ultra HD TV with an available HDMI 2.0 input that supports HDCP 2.2
- Roku player capable of streaming 4K Ultra HD
- Good internet connection with enough bandwidth to stream 4K Ultra HD (up to 25 Mbps may be needed)
- Streaming service like Netflix with a plan that supports streaming in 4K Ultra HD
- Premium High Speed HDMI® Cable (*not needed when connecting a Roku® Streaming Stick® directly to compatible TV)
HDMI 2.0 and HDCP 2.2
To successfully stream 4K Ultra HD content, all devices connected to your compatible Roku device must support HDMI 2.0 and HDCP 2.2. This includes your TV, an AVR, and any other devices connected in between. If even one device does not support HDMI 2.0 and HDCP 2.2, then the 4K movie or TV show can only be viewed in a lower resolution, such as 720p or 1080p.
HDCP 2.2 is a copy and content protection standard required by the TV and movie industry. Some older 4K Ultra HD TVs do not support HDCP 2.2, while others may only support HDCP 2.2 on a single HDMI input. Learn what to look for when trying to identify an HDMI input that supports HDCP 2.2.
Audio/video connections
Once you confirm your other devices support HDMI 2.0 and you identify the inputs that support HDCP 2.2, use the instructions below to connect your Roku player.
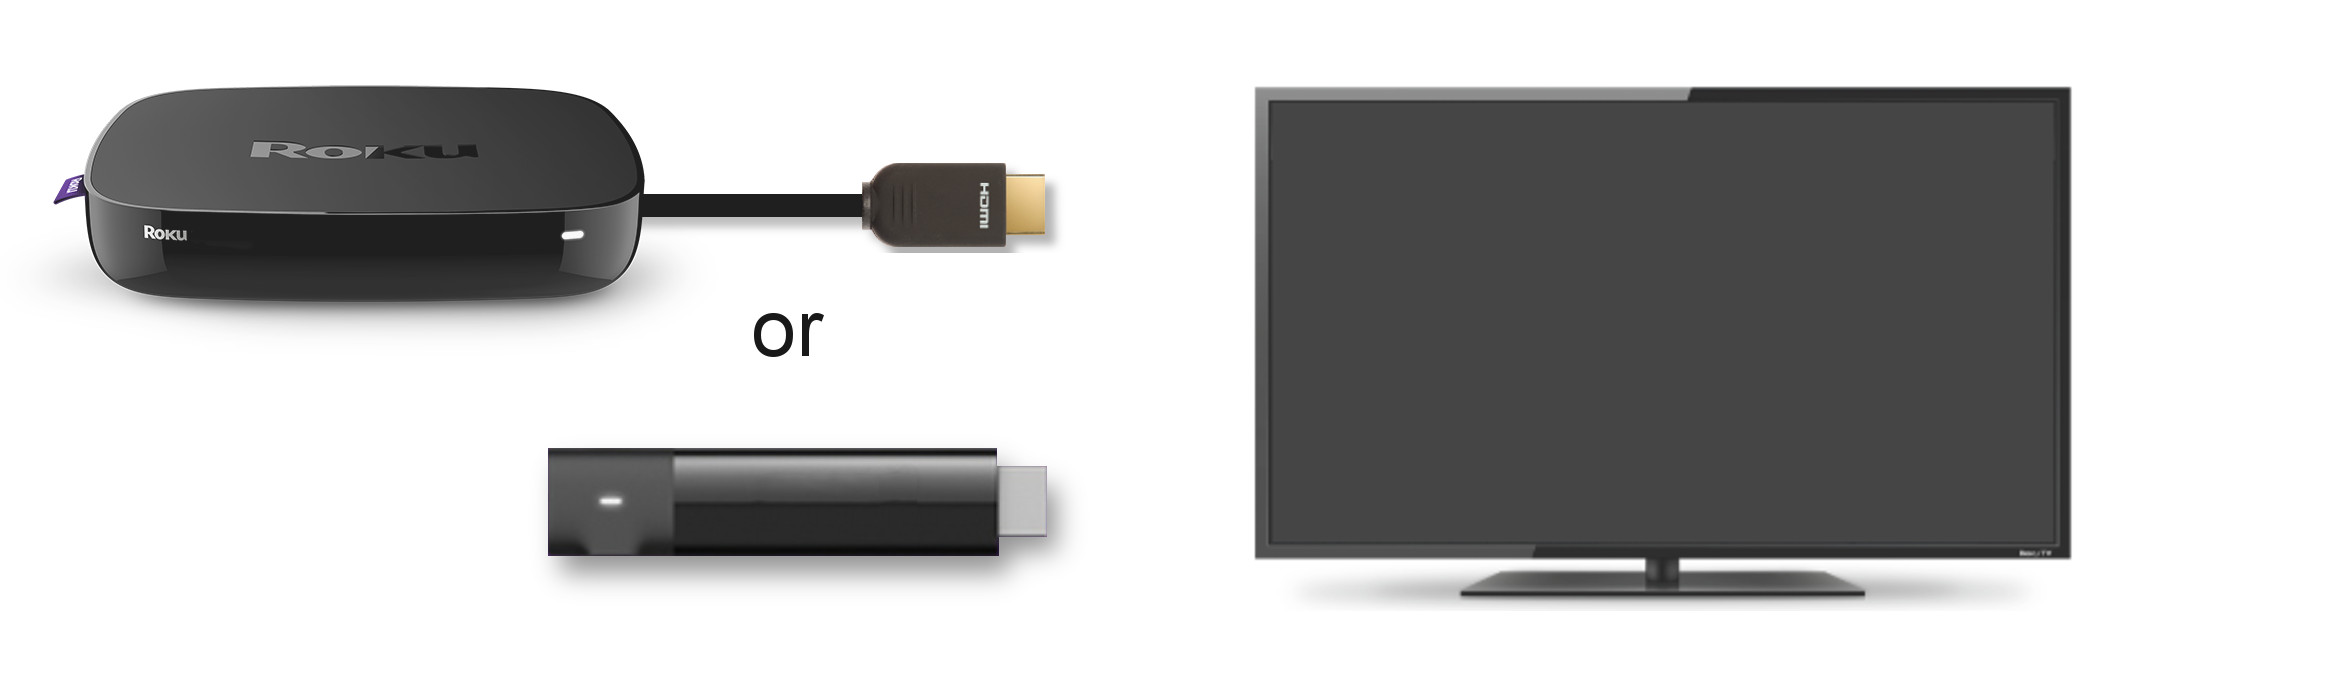
To begin, firmly attach a Premium High Speed HDMI Cable to the HDMI port on the back of your Roku player. If you are connecting a Roku Streaming Stick, it connects directly to an HDMI input and does not require an HDMI cable.

- Note: The appearance of your Roku player may differ from what is depicted in the diagrams here.
Once your Roku player is ready to be connected to your other devices, use the recommended option below that matches your configuration.
- Tip: An AVR or soundbar can be complicated to configure. If you have trouble, consider seeking help from a professional audio/video installation service.
- Connecting directly to a compatible 4K TV
- Connect the opposite end of the HDMI cable that is attached to your Roku player, or connect your Streaming Stick to an available HDMI 2.0 input on your AVR or soundbar that supports HDCP 2.2.
- Connect a Premium High Speed HDMI Cable to an output on the AVR or soundbar. Connect the opposite end to an available HDMI 2.0 input on your TV that supports HDCP 2.2.
Connecting to an AVR or soundbar with HDMI ports

- Connect the opposite end of the HDMI cable that is attached to your Roku player, or connect your Streaming Stick to an available HDMI 2.0 input on your TV that supports HDCP 2.2.
- Connect a Premium High Speed HDMI Cable to the HDMI port on your TV that supports ARC, or audio return channel. Connect the opposite end to an HDMI port on the AVR or soundbar that supports ARC. Both the TV and AVR or soundbar must support ARC. Consult your TV and AVR or soundbar product documentation for more information about this requirement.
- Connecting to an ARC (audio return channel) capable TV and AVR or soundbar
- Connect the opposite end of the HDMI cable that is attached to your Roku player, or connect your Streaming Stick to an available HDMI 2.0 input on your TV that supports HDCP 2.2.
- Connect a Premium High Speed HDMI Cable to the HDMI port on your TV that supports ARC, or audio return channel. Connect the opposite end to an HDMI port on the AVR or soundbar that supports ARC. Both the TV and AVR or soundbar must support ARC. Consult your TV and AVR or soundbar product documentation for more information about this requirement.
Configuring your TV for HDR
Your HDR TV must be configured correctly to display HDR content. Many TVs that support HDR do not enable HDR by default. You can refer to the sample instructions that accompany the popular TV brands below, but the steps may vary from model to model, and may change when TV software is updated. When in doubt, refer to the user manual or online documentation for your specific make and model. Note that the HDR settings on some TVs are specific to each HDMI input. Please make sure to change the settings specific to the HDMI input to which your Roku player will be connected.
You can refer to the sample instructions that accompany the popular TV brands below, but steps may vary from model to model, and may change when TV software is updated. When in doubt, refer to the user manual or online documentation for your specific make and model.
| Manufacturer | Instructions |
| Hisense | Switch to the Roku player input > Menu > Picture > HDMI 2.0 Format > Enhanced Format |
| LG | Go to Home > HDMI > Settings > Advanced > Picture > HDMI ULTRA DEEP COLOR > On > Restart |
| LG (alternate) | Go to All Settings > Picture > Additional Settings > HDMI ULTRA HD Deep Color > select the Roku player input > On |
| Philips | Go to Preferences > HDMI mode > select the Roku player input > 4K Mode |
| Roku TVs | Go to Settings > TV Inputs > select the Roku player input > HDMI Mode > Standard or Auto |
| Samsung | Go to Menu > Picture > Picture Options > HDMI UHD Color > On > Restart |
| Samsung (alternate) | Go to Settings > General > External Device Manager > HDMI UHD Color > On |
| Sony | Go to Home > Settings > Apps & Inputs > External inputs > HDMI signal format > HDMI > select the Roku player input > Enhanced mode > the TV will reboot |
| Vizio | Go to Menu > Input Settings > select the Roku player input > Full HD Color > On |
| Toshiba | Go to Home > Picture > Advanced Settings > HDMI Input Mode > Mode 2 (2.0) |
Guided Setup
After the connections are made, power on your Roku player and complete Guided Setup using instructions from the appropriate article on the Setup page.
Why is the image not in HDR or the picture quality poor when watching HDR content?
When you specifically watch an HDR movie or TV show on your HDR-capable Roku device, you may notice the image is not displayed in HDR, or the picture quality is poor. If you encounter this behavior, you may need to update the software on your HDR-capable TV. You can typically find instructions how to do this along with the latest software on the TV manufacturer’s website. Once you confirm that your TV is running the latest software, check that it is properly configured to enable HDR on the specific input to which your Roku player is connected. Some TVs that support HDR do not enable this feature by default.
Last updated at 3/30/2026 6:53:23 AM
Was this article helpful?
Related articles
Need more help?
