Roku TV stand assembly guide
This guide provides instructions for attaching the stand to your Roku Branded Select or Plus Series TV, or your Hiro Roku TV. Follow each step carefully to ensure secure assembly.
What you need
- Roku TV (Select and Plus Series)
- TV stand/legs (included with your TV)
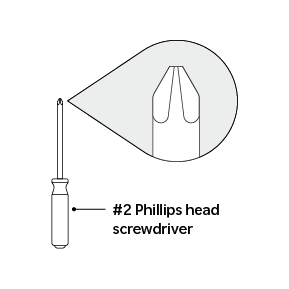
- #2 Phillips head screwdriver. Other types of screwdrivers won’t grip the screws tightly and can cause them to strip or get damaged.
- Screws included with your TV
Position the TV
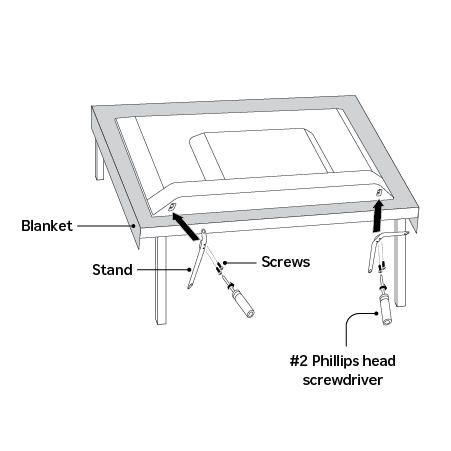
- Carefully place the TV face down on a soft, stable, and clean surface to prevent scratches.
Stand assembly
- Place one of the stands against the bottom of the TV, making sure its connection points match up with the TV’s mounting holes.
- Select one of the provided screws.
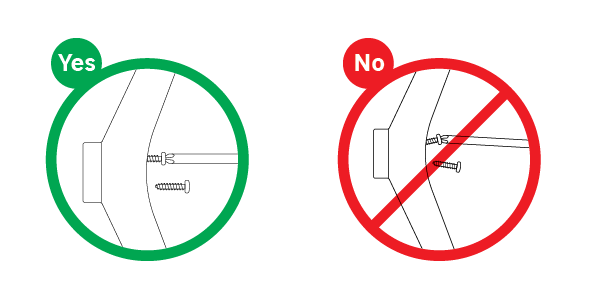
Insert the screw straight, not at an angle.
Using a #2 Phillips head screwdriver, turn the screws clockwise while applying a small amount of force.
Some models include screws with self-tapping threads that will create their own path in the plastic. Self-tapping screws require additional pressure during installation — this is normal.
Continue turning until the screw feels snug. Do not overtighten, as this can damage the plastic or strip the threads.
Repeat the steps above for all remaining screws and attachment points of the stand, ensuring each screw is securely fastened.
Verify stability
Once all screws are in place, carefully lift the TV and position it on a flat, level surface. Test the stability of the stand to confirm it is secure before proceeding with further setup or use.
If the TV stand wobbles, return the TV face-down to a soft, steady surface and check the screws again to make sure they are tightened all the way. The stand should not wobble once it’s secure.
Get help
If you are having trouble installing the stands or if the TV remains unsteady after assembly, contact Roku customer support for further assistance.
Last updated at 3/16/2026 12:59:43 AM
Was this article helpful?
Related articles
Need more help?
